Building a battery powered bluetooth speaker
2022-10-18
There a countless blogpost, youtube videos or instructables on building a battery-powered bluetooth-speaker. A lot of them have fancy woodwork and painting in common, a few even utilize a dsp to act as a crossover. But they often just slap together electronic modules in a very basic way, and use simple passive crossovers. There is a lot more potential here.
What I have not seen so far is a high-power PA bluetooth battery speaker using dsp as an active crossover. So I decided to build one.
Design goals
The speaker is supposed to be portable, rugged, as light as possible, have a replacable battery, bluetooth, enough power for outside dance events and be dsp controlled. Novices have to be able to use it. Battery protection (undervoltage) is required. Speaker-protection is also required to prevent damage. It should also have a good, clean sound and some bass enhancement for lower volumes.
The Speaker
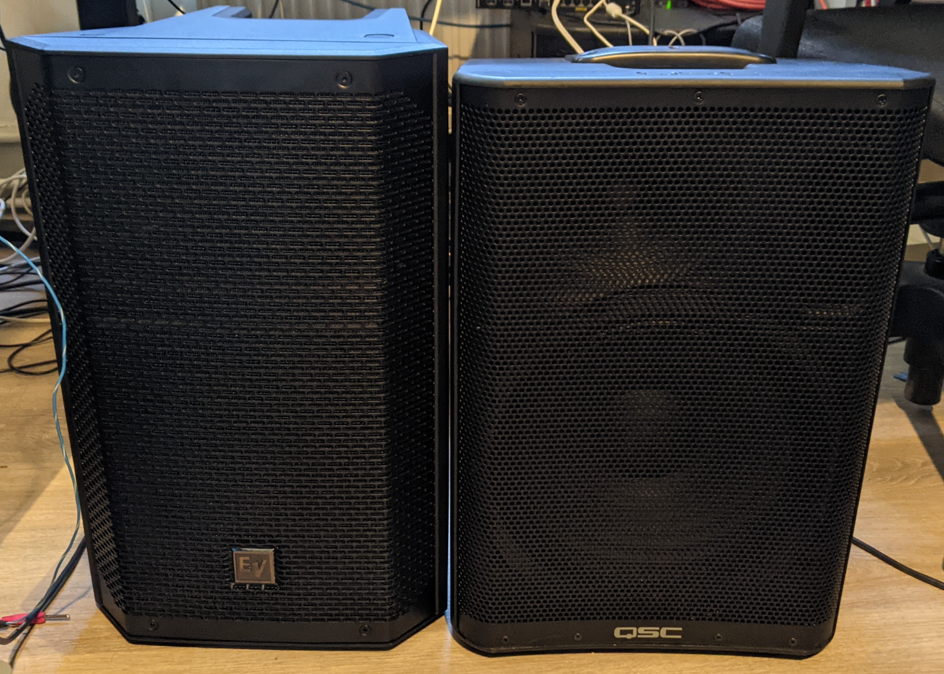
Designing and manufacturing a speaker box is quite an extensive task. As the goals for this project also include weight reduction, I decided to use a passive PA speaker from a reputable manufaturer and focus on the electronics.
The QSC CP12 (right), a nice compact active speaker would have been a perfect candidate, but modifying a 650 EUR speaker is a bit too expensive.
A passive version is not available either. After hours of research, i decided on the EV ELX200-10 (left).
Originally, I wanted to use the ZLX12, but the ELX200-10 specifications were more favorable, and it's a bit lighter (13.4kg vs 14.9kg of the ZLX12) despite the higher price of 330 Euros back in August.
Conveniently, it also fits inside the CP12s tote bag.
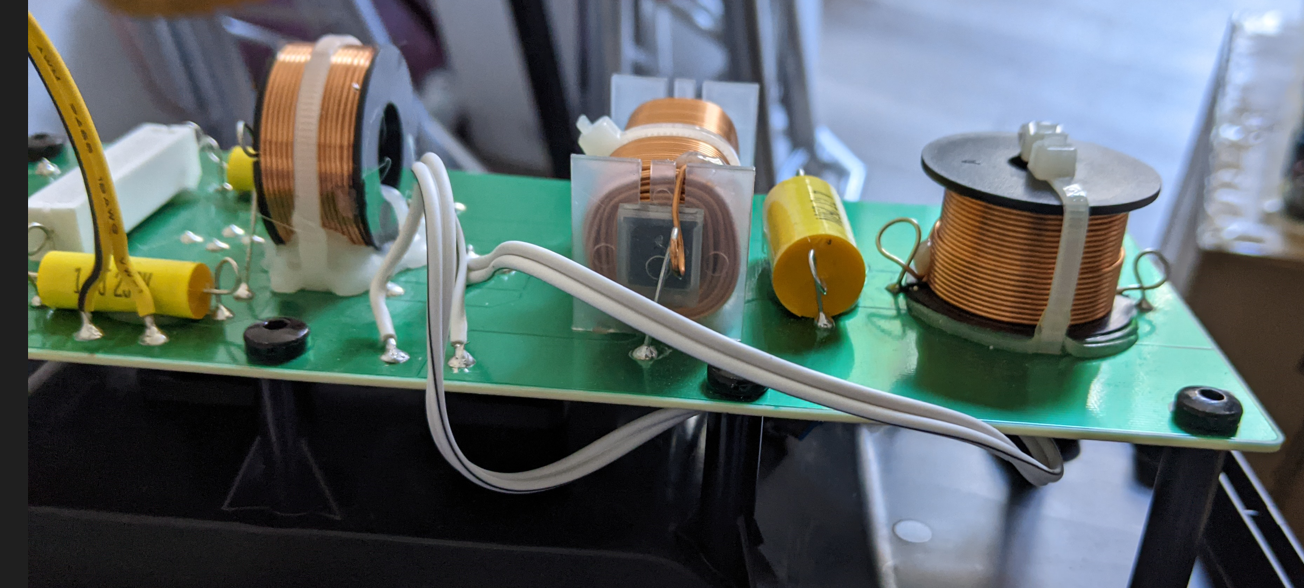
The passive crossover is on a large single-sided pcb behind the plastic rear cover. The active version of this speaker seems to use the same case, but just place the plate-amp in the same spot. I decided to first modify the passive cross-over for biamping using a switch (that connects the woofer to speakon pins 2+ and 2- instead of the x-over), before gutting it for the final version.
The crossover also conains 2 lamps for protection acting as a PTC on the tweeter. Those I kept, just in case.
One disadvantage of this speaker is that all screws are self-tappers in plastic. I try to avoid opening and closing it, and always try to find the existing thread by turning the screw backwards until I feel it click into the existing thread.
Amplification
A class-D 2-channel amp with at least 100W @ 8Ohms per channel and single-supply-rail is required. The Jab5 module from wondom fits perfectly for this project, as it can be run in a dual bridged mode, and also has the ADAU1701 DSP as well as bluetooth on board. At around 85 Euros including the cable set it is no-brainer for this box. Input voltage range is from 12-39V DC, so fits nicely. It claims 4x100W @ 6Ohms, or 2x200W at 6Ohms in BTL using a supply voltage of 36V. The speakers is rated at 8 Ohms, so power available will be less.
Power management
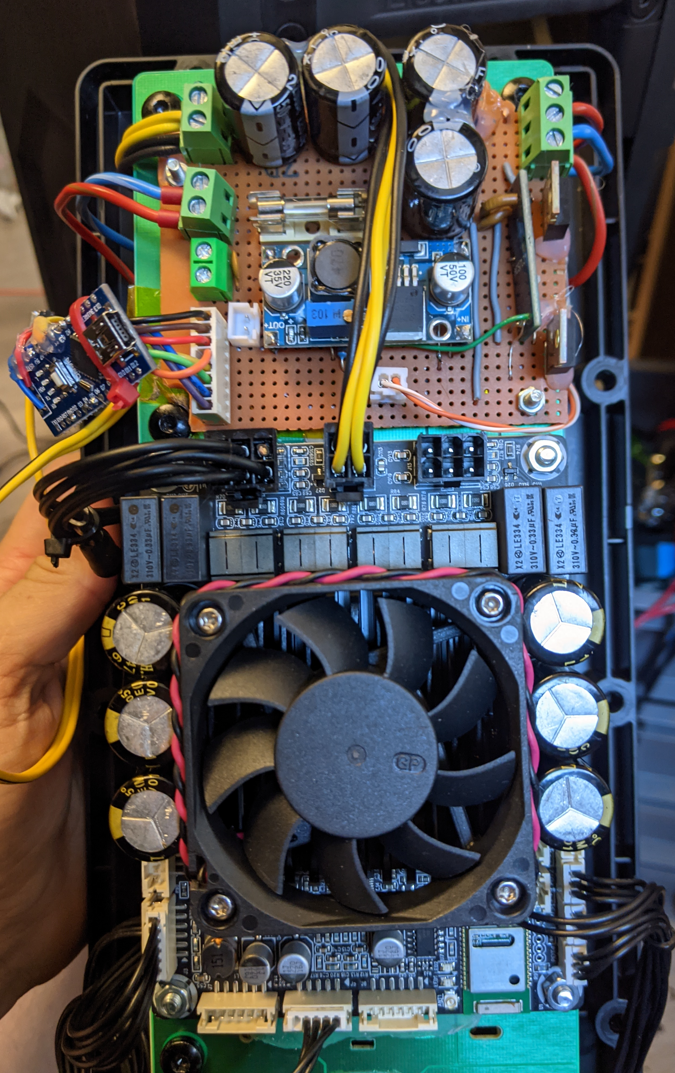
The battery of choice ia a makita 18V tool battery. It is very available, quick to charge and packs a good amount of power. 3D models are available to print mounts, and the contact-insert (Makita 643852-2 18 V battery contact plate) is also available online..
The amp board can run on 18V, but at that voltage with 8-Ohm speakers it lacks power. A simple step-up module from the online bookseller can be used to step up the voltage. I'm running the amp at 32V, that is a good compromise between power and idle-consumption. Measuring the consumption, it increases linearly with the input voltage. At this voltage, the amp consumes about 7W idle and with low volumes.
As the makita batteries do not have a built-in undervoltage-protection, I needed to implement my own in the speaker. Also, the speaker should not consume any power while it is off. I used a cheap arduino-nano clone as a microcontroller with a small oled display for status. The power button provides power to the microcontroller until it latches a p-channel mosfet to keep power on. This way, absolutely no standby power is used, and the microcontroller can turn it off completely when low-voltage shutoff condition is reached.
As soon as the microcontroller determines stable voltage conditions, it can turn on another mosfet providing power to a step-up converter powering the amplifier.
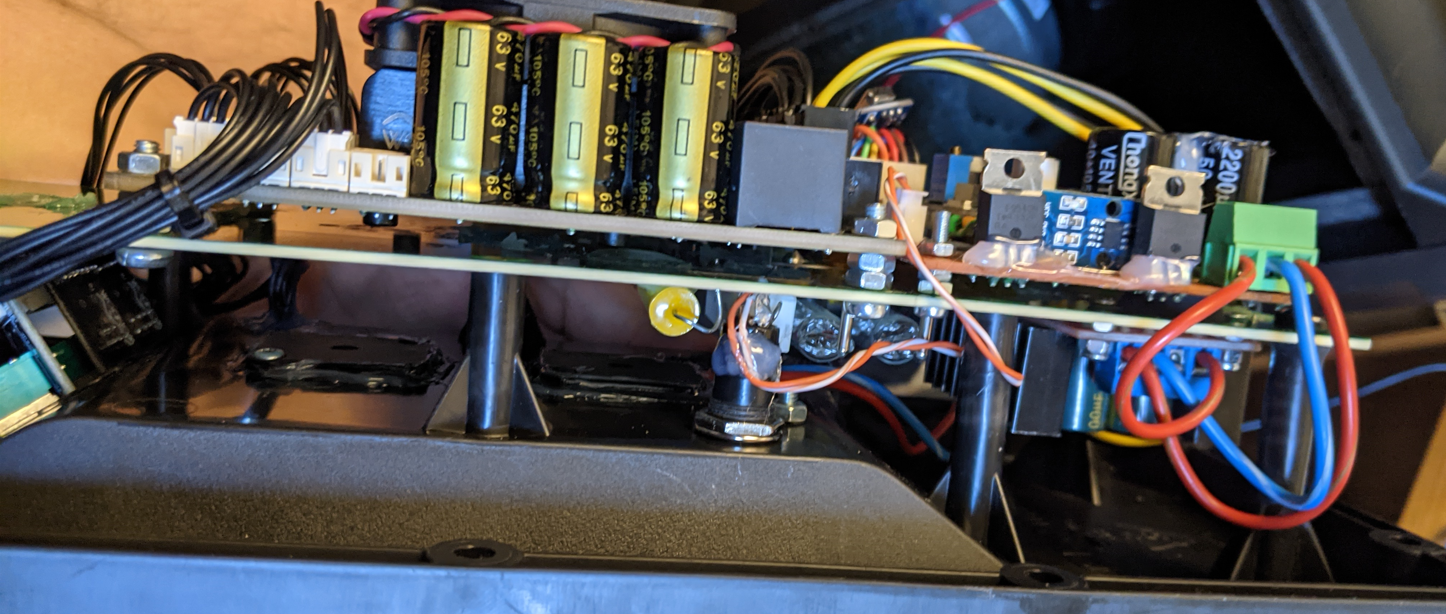
Side-View of the amp board mounted on the guttet crossover pcb.
- Top-left is the JAB-5 amplifier & dsp board.
- Top-right is the power management board with the power switch mosfets, 5V dc-dc converter for microcontroller, fuse, a lot of capacitance and voltage/current measurements.
- Bottom-right is the low-cost dc-dc boost converter claiming 400W. It converts the input 18V to 32V for the amp. Under normal operation, it does not get warm.
- Bottom-middle shows the momentary power button, a capacitor for the high frequency and the bulbs for speaker protection still in place from the original cross over.
- Bottom-left are the potentiometers for volume and a yet to be implemented function.
Back-Panel
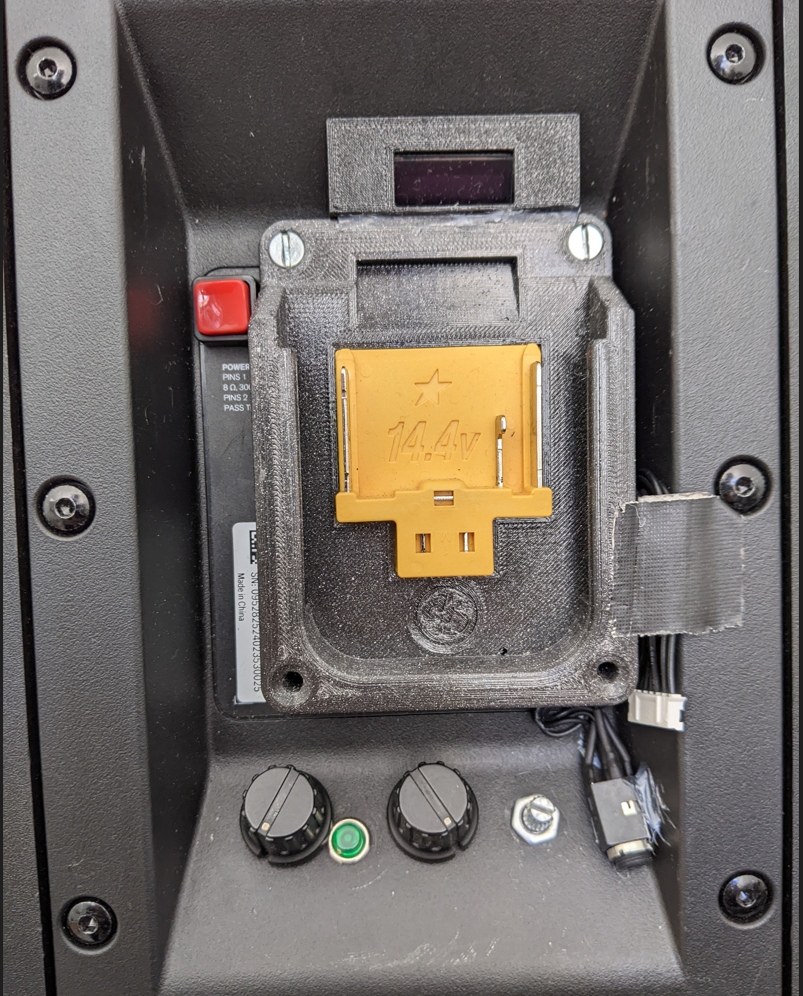
The back panel is quite simple. Battery plate, above a little oled showing the status of the speaker and battery, a power button, 3 pots: Bluetooth-volume, line-in volume, unused. The line-in is still the original mini jack from the JAB-5 kit, I plan to replace it with a proper XLR/minijack input in the future. The small green button next to the left-most pot is for unpairing bluetooth. Press it, and you can pair a different device. A cable for programming the dsp is also sticking out. This needs a better solution as well, for now it's tucked in next to the battery plate.
DSP programming
The dsp is based loosely on the original demo project provided by wondom. This version only retains the parameters for the dsp config, everything else changed.
Both inputs, analog (0, 1) and bluetooth (4, 5) are first summed and dc-blocked. A fixed gain stage is followed by a variable gain controlled by the pots using the axiliary adcs. These 2 signals are then summed and passed to a notch filter for reducing 600Hz with a Q of 1, then a 2-way Linkwitz-riley crossover block set to 1700Hz. The woofer gets a high-pass at 25Hz to prevent excessive cone movement below the ports resonant frequency, a small boost at 100Hz for more punch, dynamic bass boost below -24dB to create a fuller sound at low volumes, and finally a compressor/soft-limiter to prevent clipping before being split to the 2 DACs for the low-channel amp side.
The High-side gets a high-shelf at +1dB at 5kHz and a compressor/soft-limiter for protection as well before splitting to both High-channel amps.
Even though the amp is in Bridge-Tie-Load, the signal has to be the same phase to both channels as they are operated in parallel, not series. Inverting the signal of one output can kill the amp.

Usage and conclusions
I've used it a few times now for dance practice and outside dancing. The EQ and bass response varies widely in outside locations and gyms compared to my room at home, resulting in a bit too much bass in real usage. I've dialed it back since, thanks to the exposed dsp programming cable.
The big test is still outstanding: competing with swing music from about a hundred years against well-compressed salsa music from a JBL partybox 100. It fared ok using the preliminary external amp/crossover. Since completing the speaker, there was no outside dancing opprotunity.
It has been used as a floor-monitor for a small band at a dance party with around 60 people inside, the 2 QSC CP12 were used as main speakers, and this one for the singers monitor. As the battery was protruding too far, some pamphlets had to be stuck under the speaker to prevent it from resting on the battery. The singer was happy.
ToDo
Some things are still on my todo list:
- Measure the speaker
- XLR Inputs
- Power Input (DC)
- Accurate power measurements
Discussion
Hit me up on twitter to discuss: Twitter thread on this battery speaker